Design
 |
The Design of each Osthoff guitar is a based on a combination of tradition and technology. John believes in the philosophy of "let's not re-invent the wheel" and tries to learn from what has worked in the past, yet keeps an open mind toward new ideas. Guitar shapes are primarily based on traditional designs although John is usually willing to try to do something slightly out of the ordinary when it makes sense from a structural, tonal and aesthetic standpoint. |
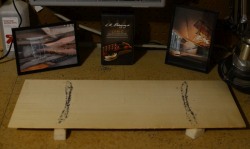
In this shot, John is Dynamically Testing the Top. He is "driving" the top with a sine wave, and looking for this particular pattern by getting the particles to land on the node points. By taking some careful measurements, a calculation can be done to get the modulus of elasticity. In this case, he is looking at the stiffness along the grain. |
 |
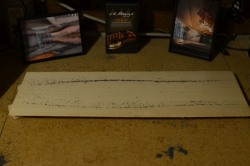 |
Here the top is also being driving with a Sine wave although at a different frequency. The pattern in this case is indicating stiffness across the grain. Although the nodes (lines) in these cases are fairly straight, sometimes there will be a curve which indicates some variation in stiffness across the plate. This piece of spruce seems quite homogenous. |
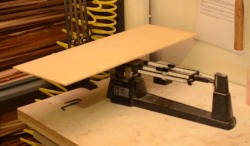
Just getting a weight. It is used to calculate the density. The information gathered is used to "come-up" with a target thickness of the top (and back) based on the factors found in these tests and size of the guitar being built. The info is pluged into a spreadsheet. "I call this spreadsheet, my thickness prodictor. It gets me really close, and I have to do a lot less fiddling with the bracing when we get there." |
 |
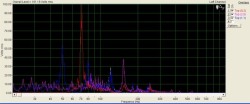 |
Some of the same information can be obtained from spectrum analysis. John tends to use this more when the top is braced. That combined with glitter pattern testing is how he gets the top close but still does the final voicing by ear. |
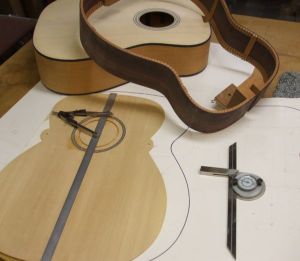
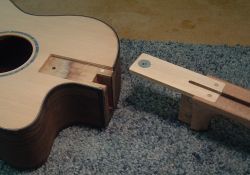
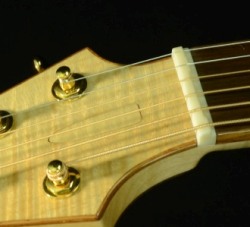
Although a dovetail joint will be used in many of John's Custom Series instuments, he was looking for a more modern approach to a neck joint that would make maintenance and adjustments easier. After a couple converstions and encouragement from Dana Bourgeois, John created a design of a removeable neck based loosely on Dana's idea. In the photo you can see a 12-fret neck where the fretboard extension block is shown. The trussrod slot is installed and now accessable from the headstock |
 |
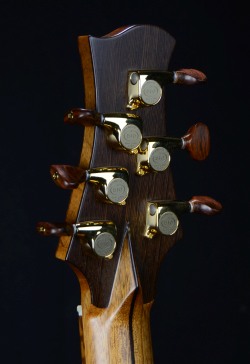 |
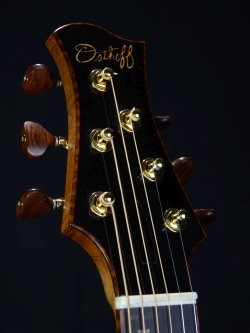
Some players wanted trussrod access from the headstock. This made sense to John too as it makes it easier to do an adjustment with the strings on. Now with the trussrod access at the headstock, a consideration for the removal of material out of the headstock should be made, so John added a diamond volute to the back. While contemplating the new design, John thought it made sense to use a rear headstock veneer too. It occured to him that he had seen this treatment done, before and with a little searching ended up at James Olson's site. Jim told John that he certainly was not the first one to use this type of treatment although he thought that adding purfling lines around the diamond was very rare and he thought that might be unique to him. Still Jim encouraged John to use the diamond volute and even the purfling lines. (Very classy) |
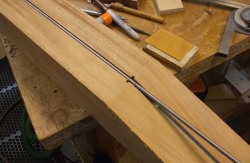
John is now fabricating his trussrods from titanium. It is a little difficult to machine, but strength and light weight of the material make it worth the effort. |
 |
 |
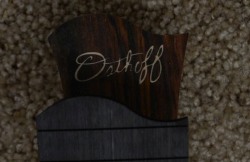
A number of years ago, John introduced his Stealth Truss Rod Cover. Although getting to the trussrod should not be needed very often, opening the cover is a simple procedure of using the core of a guitar string to push open the cover from the back of the headstock. |
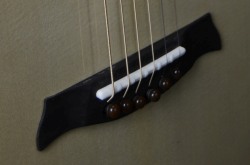
In the previous photo, you can see the fully compensated nut. It is part of the system, along with the saddle which gets better intonation across the frets. There is plenty of information out there on intonation with many articles from the Guild of American Luthiers(GAL.) In addition, Trevor Gore's Book(s) were helpful in John establishing his system for nut and saddle compensation. The saddle is also tilted backward 7 degrees not only providing better downward pressure, but creating a self-compensating system if the saddle needs to be lowered or heightened (with a shim.) |
 |
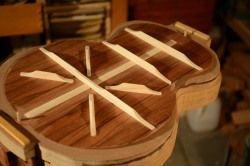 |
John uses an active back in his guitars. The radial bracing pattern now used in all of his guitars is a direct influence from the designs of Trevor Gore and published in his above mentioned books. John adapted the pattern to suit his guitars but the gist of it is from Gore. |
The sides are made of two pieces of tonewood, bent, the epoxied together. This makes a very rigid, rim that is not as prone to cracks. |
 |
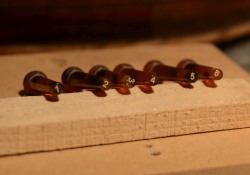 |
John uses unslotted pins. Not so much as a design element, but John also numbers the bridge pins according to match the string they go with. Although the pins, are interchangeable, there could be slight differences and some players prefer to keep the track of the pins. The numbers make it easy to keep track of them. |
The idea of the strings going in a straight line from the tuner post over the nut onto the fretboard has always made sense to John. Long before Gore's books, John was working on his Straight String Pull (SSP) headstock. It took years of development and is now John's preferred headstock. As a custom builder, John is still willing to venture into other areas, including a traditional paddle, a slothead, or even his newly developed NQSSP, (Not Quite Straight String Pull) headstock. |
 |
 |
When talking about the design of a guitar, a lot of thought goes into the structural elements, the tonewood, body shape etc. Another important factor is the aesthetic design. Lines and curves become an element of design and carry throughout. |
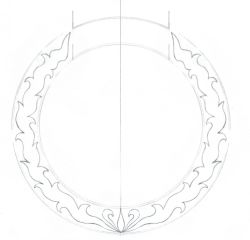
Shown in the next couple of pictures, is the way an idea can become a finished product. Here on the right, is a concept and sketch supplied by a customer for a rosette that he wanted. |
 |
 |
Some refinement was done, and the sketch was made a little more formal and sent to the customer for approval. Next, we talked about what materials to use for the rosette. |
With the help of our Graphics Guy, we tried ebony on koa, but settled on using Brazilian Rosewood on a a maple background, with the rosewood for the outer purflings. |
 |
 |
Here is a look at the completed Rosette. From idea, to sketch, to a more refined sketch, choosing materials, to the final product. |
John hopes to add more information about design over the course of time. Also, see the Research Page for more information on about some of the acoustical design properties that go into his guitars