Making the Dot & Lozenge Rosette
This is a little "how to" article that John originally posted on the 13thFret Guitar Forum. He cleaned it up (a little) and it was saved for future reference. It was recreated here also. John has a couple more (small) articles in the work and hopes to 'publish' them soon. It is tough, as most of his customers would prefer him to be in the shop finishing their guitars. Still check back soon for updates. For now here is the article on making the rosette:
Here is the Description of the process that I used to create the Dot & Lozenge Rosette. I got the idea out of Irvin Sloan's Steel-String Guitar Construction book. According to Sloan, the pattern was taken from Stradivarius for the ivory and paste purfling of the Rode Violin (1722). Al Carruth also did one of these rosettes and offers some advice. His influence was also from Stradivarius but came from his 1688 guitar that's in the 'Shrine to Music Museum.' Regardless of the influence, each luthier has the opportunity to add their own personal flair to the design as well as using construction techniques that best suit their own needs.
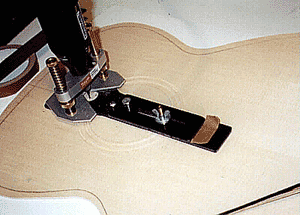 |
I have used a drill press mounted fly-cutter for rosette channels in the past but I did these channels with a Dremel tool and down-cut carbide router bit. I made the router attachment out of some smoked plexiglass that I had.. The Dremel router base came from Stew Mac. I used a piece of tape as a reference mark to tell how much the fixture was moved when making adjustments. |
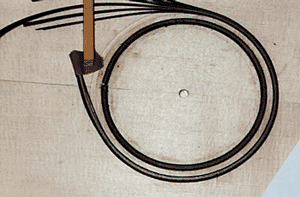 |
I routed out two channels to accept the purflings. I used (3) WB .020" strips sandwiched between some .040" black strips. Notice the piece of wood with the purfling strips going through it. It is the purfling organizer idea I got from the 13thFret.com. Thank you to whoever posted that and gave me that idea! It is just a piece of small wood with some holes drilled in it to keep the purflings in order. It really works great. |
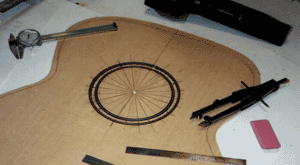 |
Next I laid out for the Mother of Pearl (MOP) dots. I bought them after making a few. The price out-weighs the effort of making them. I used 3mm (about 1/8 inch) Dots. The diamonds were all cut out from .050" thick MOP. I printed an outline of the diamond on address labels and stuck them to the pearl. I used a cut-off wheel in my Dremel to do most of the cutting. Al made a little miter box for cutting pearl diamonds out of a strip. A narrow bladed X-Acto saw works fine, and lasts a surprisingly long time. (I will definitely do that next time.) Al suggests that you can piece together some pretty cool snowflakes from 60 degree diamonds. |
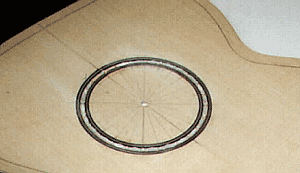 |
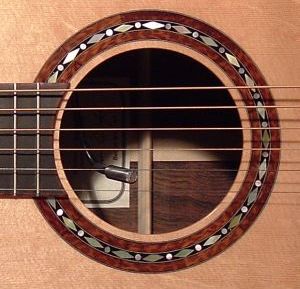
The next step was to rout the channel for the MOP. Try to get the depth pretty close to the thickness of the MOP. I glued all the dots in first and then did the diamonds. I used cyanoacrylic to hold down the dots and diamonds. Then it came time to fill around the MOP. I used black epoxy. Sloan's book said to grind up refined charcoal and mix it with white glue. I think you could use black furniture powder too. Fill it and sand it down. It took about 3 times to get the epoxy level. |
 |
Al offers some words of caution. "The biggest problem I had on mine was the use of black-dyed veneer for the purfling lines. I used 'West System' epoxy for the fill, and the color leached out of the purfling lines and into the end grain of the top! I did manage to sand it back enough to look good, but.... Be sure to check all of your materials for compatibility first folks!" John now typically seals his rosette channels with some shellac depending on what glues he might be using during the process. Be careful with some cyanoacrylics as they will wick into endgrain creating a yellow stain that will not sand out. I have heard that many sunbursts were born from this type of mishap. Anyway That's it. That is how I do these rosettes. |
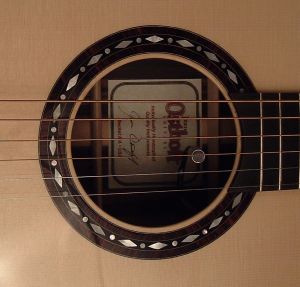 |
Here is an example with some Brazilian Rosewood used for the surounding woods. Also in this example (and the one above) you can see the K&K microphone in the soundhole. Both these guitars also have the pure western pickup(s) installed on the bridgeplate as well |
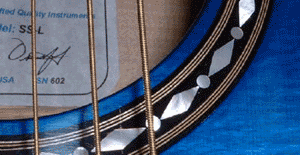 |
I am really happy with the outcome of these rosettes. They take some time but they are fairly fun to make. I will be making more of these in the future and maybe one day I will do a purfling in this scheme. Of course, Thanks to Al for his comments and encouragement. Visit his site Alan Carruth Luthier. |